Difference between revisions of "Aliphatic Urethane for Hardwood Floor Refinishing"
| Line 20: | Line 20: | ||
==Sanding the Old Floor== | ==Sanding the Old Floor== | ||
With nearly all the tar removed, it was determined to sand the floor<ref>A note should be made on the importance of removing as much tar as possible. Can you sand the tar off? Yes, however the tar will stick to the sanding paper, and it will not easily come off. It is best to remove all tar paper before sanding to avoid this scenario. The white film of glue is not an issue for the sanding paper.</ref>. Two sanders were used on this floor, both rentals from the local Home Depot hardware store. We used the orbital sander, and the drum sander. The orbital was not effective. The drum sander was required. One step we missed here was that we didn't finish with a high enough grit on the drum sander. This was made up for later in the urethane stage, but if you are to sand a floor with a drum sander, we recommend starting low, and ending with the highest grit for drum sanders available (which is 100 for the rental we used). <ref>I would recommend starting with 20 or 30 if you have tough wood like ours was. You want to get underneath the finish without too much of a fight. Remember the adage: good tools do work, bad tools make work. With sanding, this is important. If you aren't making progress as you sand, you need more power.</ref> A result of the sanding ended up looking something like this: | With nearly all the tar removed, it was determined to sand the floor<ref>A note should be made on the importance of removing as much tar as possible. Can you sand the tar off? Yes, however the tar will stick to the sanding paper, and it will not easily come off. It is best to remove all tar paper before sanding to avoid this scenario. The white film of glue is not an issue for the sanding paper.</ref>. Two sanders were used on this floor, both rentals from the local Home Depot hardware store. We used the orbital sander, and the drum sander. The orbital was not effective. The drum sander was required. One step we missed here was that we didn't finish with a high enough grit on the drum sander. This was made up for later in the urethane stage, but if you are to sand a floor with a drum sander, we recommend starting low, and ending with the highest grit for drum sanders available (which is 100 for the rental we used). <ref>I would recommend starting with 20 or 30 if you have tough wood like ours was. You want to get underneath the finish without too much of a fight. Remember the adage: good tools do work, bad tools make work. With sanding, this is important. If you aren't making progress as you sand, you need more power.</ref> A result of the sanding ended up looking something like this: | ||
| + | |||
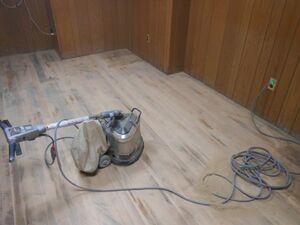
| + | [[File:OrbitalSanderOnHardwoodResults.jpg|300px|thumb|right|The orbital sander did not fully sand the floor.]] | ||
| + | |||
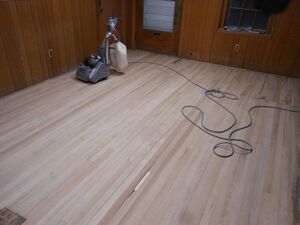
| + | [[File:SandingHardwoodFloor.jpg|300px|thumb|right|The drum sander was able to do the work.]] | ||
| + | |||
| + | ==Patching of the Hardwood Floor== | ||
| + | Before you apply the finish, the floor should be relatively free of imperfections. Apply wood filler where needed. Wood powder <ref>to be mixed with water and used as putty</ref> or premixed wood putty can be purchased at retail stores. We recommend traveling to a retailer that specializes in hardwood flooring, as they tend to have a better selection than the big box retail stores. In our situation, we used Woodwise Powdered wood filler, as in the picture here. | ||
| + | |||
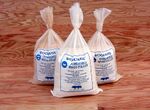
| + | [[File:Powdered-3-Bags.jpg|150px|thumb|right|Patching the floor is required before finishing, whether it be hardwood, epoxy, or a tile floor.]] | ||
Revision as of 04:49, 27 March 2020
This was a project undertook by a member of Advance Coatings, co. starting in 2019. The overall project was for renovation of an office, which encompassed the following projects
- Renovate walls by returning to original Brick
- Remove carpeting, and restore original Hardwood Floor
- Open Ceiling, by removing drop ceiling tiles
- Rewire Electrical with accessible conduit
- Misc painting, drywall, trim, and wiring of low voltage.
Of interest to us here is the floor refinishing. This refinishing was done with the help of a Urethane we resell. This document will go into detail the full hardwood floor refinishing process in as much detail as possible (after the fact). This info will be useful to those interested in Refinishing, as well as those interested in general Urethane advice with hardwood. Note that this page is meant as an adjunct to the Aliphatic Urethane page. It is recommended to be familiar with that page as well.
Original Floor
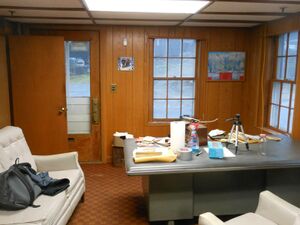
The office was originally a hardwood floor, from a building built in the 1930-40's. At one point afterwards, a black tar glue was put on the floor, followed by plastic (vinyl, perhaps) tiles. In the 1960-70's, there was carpeting installed, over the original hardwood and tiles. The first step was removal of the carpeting, and tiles.
Removing Tar Glue from Hardwood with Hot Water
Removal of the carpeting was uneventful, outside of some dust. Removal of the tiles was also effortless, however the black tar below was seemingly glued to the hardwood. An associate in the construction business was consulted, and he recommended hot water and scraping to remove the black tar[1].
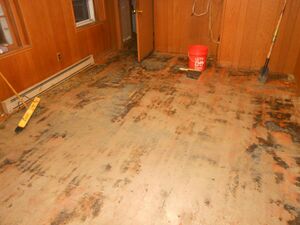
The trick to the black tar that we dealt with, was to use lots of water, and have the water be as hot as possible. It was also helpful to let the water sit on the tar for some time, in order to soak in. In the end, no concern was paid to overwatering the hardwood, and ample amounts of water, along with some hours of scraping, led to a floor 95\% clear of black tar. The black tar left a detergent or glue film to the wood, but this was not a problem. The sanding would soon remove this.
Sanding the Old Floor
With nearly all the tar removed, it was determined to sand the floor[2]. Two sanders were used on this floor, both rentals from the local Home Depot hardware store. We used the orbital sander, and the drum sander. The orbital was not effective. The drum sander was required. One step we missed here was that we didn't finish with a high enough grit on the drum sander. This was made up for later in the urethane stage, but if you are to sand a floor with a drum sander, we recommend starting low, and ending with the highest grit for drum sanders available (which is 100 for the rental we used). [3] A result of the sanding ended up looking something like this:
Patching of the Hardwood Floor
Before you apply the finish, the floor should be relatively free of imperfections. Apply wood filler where needed. Wood powder [4] or premixed wood putty can be purchased at retail stores. We recommend traveling to a retailer that specializes in hardwood flooring, as they tend to have a better selection than the big box retail stores. In our situation, we used Woodwise Powdered wood filler, as in the picture here.
- ↑ According to this person, hot water was the most effective at removing this tile glue. The other options advertised, solvents and what not, were not as effective.
- ↑ A note should be made on the importance of removing as much tar as possible. Can you sand the tar off? Yes, however the tar will stick to the sanding paper, and it will not easily come off. It is best to remove all tar paper before sanding to avoid this scenario. The white film of glue is not an issue for the sanding paper.
- ↑ I would recommend starting with 20 or 30 if you have tough wood like ours was. You want to get underneath the finish without too much of a fight. Remember the adage: good tools do work, bad tools make work. With sanding, this is important. If you aren't making progress as you sand, you need more power.
- ↑ to be mixed with water and used as putty
