Difference between revisions of "Aliphatic Urethane for Hardwood Floor Refinishing"
| Line 103: | Line 103: | ||
==Hindsight 2023== | ==Hindsight 2023== | ||
| − | While we have a much better room than before, we have more of a drafty room. It's apparent now the rugs were put in because the foundation is some feet below the hardwood (raised floor), and because of cracks around the edges of the room, it gets cold in the winter. Though this is easily fixed by opening the door from the rest of the office, where the heat blows in and heats it up. What is the solution: would I put rugs back in? No, I would not. I avoid rugs whenever possible. They collect dust. I also would not reinstall the wood paneling walls, or the drop ceiling. What should be done, is the hardwood floor should be completely pulled up, and proper floor insulation should be put in, then the hardwood should be put back down. This is not a trivial project. In any case, it wasn't a flawless victory with the renovation, but it was an improvement. Note that this is only an issue in the dead of winter, when the room has been closed up. The rest of the year, the room is comfortable. | + | While we have a much better room than before, we have more of a drafty room. It's apparent now the rugs were put in because the foundation is some feet below the hardwood (raised floor), and because of cracks around the edges of the room, it gets cold in the winter. Though this is easily fixed by opening the door from the rest of the office, where the heat blows in and heats it up (A relevant resource here is: https://en.wikipedia.org/wiki/Thermal_transmittance). What is the solution: would I put rugs back in? No, I would not. I avoid rugs whenever possible. They collect dust. I also would not reinstall the wood paneling walls, or the drop ceiling. What should be done, is the hardwood floor should be completely pulled up, and proper floor insulation should be put in, then the hardwood should be put back down. This is not a trivial project. In any case, it wasn't a flawless victory with the renovation, but it was an improvement. Note that this is only an issue in the dead of winter, when the room has been closed up. The rest of the year, the room is comfortable. |
Latest revision as of 00:10, 16 October 2024
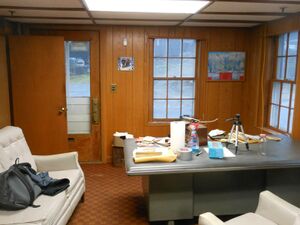
This was a project undertook by a member of Advance Coatings, co. starting in 2019. The overall project was for renovation of an office, which encompassed the following projects
- Renovate walls by returning to original Brick
- Remove carpeting, and restore original Hardwood Floor
- Open Ceiling, by removing drop ceiling tiles
- Rewire Electrical with accessible conduit
- Misc painting, drywall, trim, and wiring of low voltage.
Of interest to us here is the floor refinishing. This refinishing was done with the help of a Urethane we resell. This document will go into detail the full hardwood floor refinishing process in as much detail as possible (after the fact). This info will be useful to those interested in Refinishing, as well as those interested in general Urethane advice with hardwood. Note that this page is meant as an adjunct to the Aliphatic Urethane page. It is recommended to be familiar with that page as well.
Overview
- sand down old floor to bare wood
- clean dust from floor with tack cloth / paper towel & water
- apply primer coat
- apply 2nd coat (hardwood required two coats, as the first coat mostly soaked in.)
- sand urethane with floor orbital sander (e.g. 80 or 100 grit)
- clean dust from floor once again
- apply 3rd coat
Preparation
The office was originally a hardwood floor, from a building built in the 1930-40's. At one point afterwards, a black tar glue was put on the floor, followed by plastic (vinyl, perhaps) tiles. In the 1960-70's, there was carpeting installed, over the original hardwood and tiles. The first step was removal of the carpeting, and tiles.
Removing Tar Glue from Hardwood with Hot Water
Removal of the carpeting was uneventful, outside of some dust. Removal of the tiles was also effortless, however the black tar below was seemingly glued to the hardwood. An associate in the construction business was consulted, and he recommended hot water and scraping to remove the black tar[1].
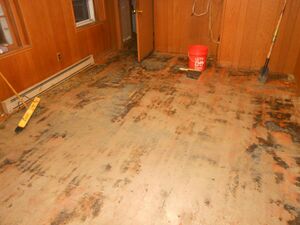
The trick to the black tar that we dealt with, was to use lots of water, and have the water be as hot as possible. It was also helpful to let the water sit on the tar for some time, in order to soak in. In the end, no concern was paid to overwatering the hardwood, and ample amounts of water, along with some hours of scraping, led to a floor 95\% clear of black tar. The black tar left a detergent or glue film to the wood, but this was not a problem. The sanding would soon remove this.
Sanding the Old Floor
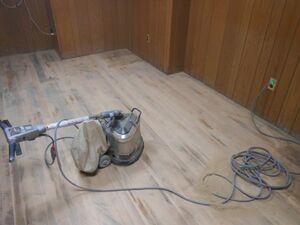
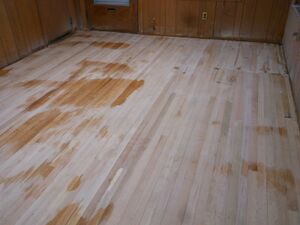
With nearly all the tar removed, it was determined to sand the floor[2]. Two sanders were used on this floor, both rentals from the local Home Depot hardware store. We used the orbital sander, and the drum sander. The orbital was not effective. The drum sander was required. One step we missed here was that we didn't finish with a high enough grit on the drum sander. This was made up for later in the urethane stage, but if you are to sand a floor with a drum sander, we recommend starting low, and ending with the highest grit for drum sanders available (which is 100 for the rental we used). [3] A result of the sanding ended up looking something like this:
Patching of the Hardwood Floor
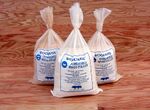
Before you apply the finish, the floor should be relatively free of imperfections. Apply wood filler where needed. Wood powder [4] or premixed wood putty can be purchased at retail stores. We recommend traveling to a retailer that specializes in hardwood flooring, as they tend to have a better selection than the big box retail stores. In our situation, we used Woodwise Powdered wood filler, as in the picture here.
Testing of the Urethane
If you want to test the urethane before committing to the floor, find a small patch in the corner or an inconspicuous spot to apply some finish to. Here we tested two brands. Keep the spots small, so they can be sanded out without difficulty later.
Cleaning Floor for Urethane
Just before applying the finish, thoroughly clean dust off the floor to prepare. Vacuuming, followed by tack cloths or damp rags can be used to get the dust off of the floor. Once you can put a tack cloth over the wood without getting much on it, you are ready for urethane.
Application
You will require the following items:
- Proper Mask (should be rated for organic vapors. We use and recommend Moldex 7000 series reusable half mask. Details at Aliphatic_Urethane
- 3/16 Nap Roller Brush 9in. or larger
- Roller and Pole
- 3 or 5 gallon pail to mix resin and hardener
- Tool to mix the urethane with
- (optional) brush for edges OR 4 inch nap and roller
Safety Considerations
The aliphatic Urethane we sell is aromatic, and also offensive in large amounts. Apply after hours, and do not work in the area the urethane is in, after applying (Also, do not apply the urethane where others are working, especially if they don't have breathing protection). It is best to apply at the end of a day, or a Friday afternoon or evening, when the room can be left to cure overnight. The urethane is a strong coating, but it also has a strong smell, and will overpower you, if you try to work around it without proper protection. At the least, apply urethane at the end of the day, and wear the recommended mask. The urethane will not bother you with the mask, but as soon as you remove it, you will want to leave the area to let it cure.
Putting Down the Urethane
Take the pails of urethane and shake them, to mix any resin that might have settled. Mix the two parts of urethane into a 3 gallon pail. 2 Parts Resin (A) for 1 part Hardener (B). Stir to mix thoroughly in the pail.
For this room, the edges were brushed (Cheap brushes can be used, although it's important to 'pull' the loose hairs out of the brush first. There is no requirement for an expensive brush. A 4 inch roller will give better results than a brush, but the brush is more agile, and can reach corners, and around doors better.), although a 4 inch roller can also be used. The edges were done first, followed by starting at one side of the room, so as to give ourselves a way out (do not paint yourself into a corner so to speak, when urethaning. Plan where you will be applying the urethane, as you can't walk on wet finish).
When applying the urethane, you want to pour some of it into a puddle in front of yourself, then mostly pull the urethane towards you. The idea is to have a small pool of urethane riding in front of the nap roller, similar to how a dolphin rides the waves in front of a large steamship. When the pool of urethane has run out, you will want to apply more. This is called 'flooding' the floor. The nap roller will give the appropriate amount of urethane. Generally, do not press the nap roller down to apply. It rides on top of the floor, as you pull the pool of urethane towards yourself. There is a video demonstrating this process to the right.
This method with the pool will give the appropriate amount of thickness for the urethane. Note that a smooth floor will not be expected in early coats. In this floor, we required 3 coats, to get a glass finish.
Bright Lights are Essential After the 1st Coat
I want to note the difference good lighting will make in the results of your work. When you do the first coat on hardwood, you can visually see the finish darken the wood, and you can use that as a guide. But, once the first coat is down, you will need strong lights above, and at angles to see where the finish is and isn't applied. Too much lighting is better than not enough. In our floor, we put down two coats, completed some renovation work - including adding overhead LED lights - then completed the third and final coat. The addition of overhead lighting was important towards seeing what was and was not 'flooded' fully with urethane.
Last Coat Prep
At this point, we removed the walls and ceilings. We rewired the electrical outlets opting for conduit, and replaced the windows, along with a fresh paint job on the wall. After this work was done, it was time to return to the floor, for a final coat.
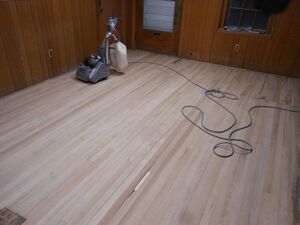
The floor was rough. It had two coats, but there were a lot of specks here and there on top of the urethane finish. I used a floor orbital sander rented from a local hardware store with 80 grit, and after a couple hours had the large spots and specks on the surface of the urethane sanded off (the goal is to sand smooth the surface of the urethane not go down to the wood). Note that in order to get a smooth finish, sanding before the final coat is required.
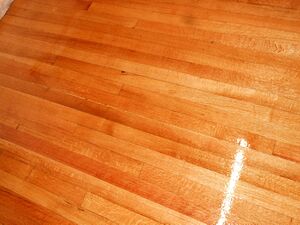
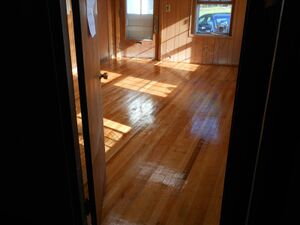
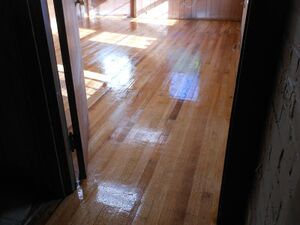
After this was done, we turned the new LED lights above the ceiling, cleaned the floor, and applied the final coat. After application of this coat. on a late afternoon, we left the building to let the urethane cure (as it smells strongly) The next week, we returned to a glassy and glossy urethane floor. Some small spots needed attention with a brush, and a small amount of urethane this next week, but otherwise the floor was ready for production.
Ending
Now we have a protected floor, and a new office, being able to keep the original 1940's hardwood. It has imperfections, but that's part of the allure of this industrial setting. We are happy with the results. It is functional, imperfect, and charming.
Hindsight 2023
While we have a much better room than before, we have more of a drafty room. It's apparent now the rugs were put in because the foundation is some feet below the hardwood (raised floor), and because of cracks around the edges of the room, it gets cold in the winter. Though this is easily fixed by opening the door from the rest of the office, where the heat blows in and heats it up (A relevant resource here is: https://en.wikipedia.org/wiki/Thermal_transmittance). What is the solution: would I put rugs back in? No, I would not. I avoid rugs whenever possible. They collect dust. I also would not reinstall the wood paneling walls, or the drop ceiling. What should be done, is the hardwood floor should be completely pulled up, and proper floor insulation should be put in, then the hardwood should be put back down. This is not a trivial project. In any case, it wasn't a flawless victory with the renovation, but it was an improvement. Note that this is only an issue in the dead of winter, when the room has been closed up. The rest of the year, the room is comfortable.
- ↑ According to this person, hot water was the most effective at removing this tile glue. The other options advertised, solvents and what not, were not as effective.
- ↑ A note should be made on the importance of removing as much tar as possible. Can you sand the tar off? Yes, however the tar will stick to the sanding paper, and it will not easily come off. It is best to remove all tar paper before sanding to avoid this scenario. The white film of glue is not an issue for the sanding paper.
- ↑ I would recommend starting with 20 or 30 if you have tough wood like ours was. You want to get underneath the finish without too much of a fight. Remember the adage: good tools do work, bad tools make work. With sanding, this is important. If you aren't making progress as you sand, you need more power.
- ↑ to be mixed with water and used as putty
